Category: History

  • How to Study for AP US History Exam: 2026 Plan

    How to Study for AP US History Exam: 2026 Plan

    You're probably in that familiar APUSH spot right now, where the textbook is open, the calendar is full, and rereading chapter after chapter feels productive even though it's not moving your score. If you're a junior halfway through second semester, juggling AP U.S. History with three other classes, the honest answer is simple, covering the book is not the plan. You need a staged workflow that builds score, not just comfort.

    Table of Contents

    What a High-Yield AP U.S. History Study Plan Actually Looks Like

    A strong AP U.S. History plan is not a content marathon. It's a sequence of decisions, and the student who wins is usually the one who stops trying to “finish” history and starts training for the test that's in front of them.

    Start with the score target, not the syllabus

    The best plan has four phases. First, you take a diagnostic full-length exam so you know what's broken. Second, you run a daily routine that mixes content with skill work instead of rereading. Third, you drill the updated SAQ and LEQ formats so writing stops being a weakness. Fourth, you tighten into a timed revision window, usually 8 to 12 weeks long, with full practice conditions in the final 4 to 6 weeks as laid out in this AP U.S. History study guide.

    That sequence matters because content review without writing practice caps a lot of students' scores. If you can recognize events but can't turn them into a thesis, contextualization, and evidence on command, you're leaving points on the table. The higher-return move is to treat DBQ and LEQ work as a skill, not a final-week add-on.

    Practical rule: if your study time doesn't produce written output, you're probably studying too passively.

    For a clean framework, I'd also pair your plan with an actionable APUSH study plan from Cramberry, then make your own version stricter and more test-specific.

    A four-phase study plan infographic for the AP US History exam, showing diagnostic, audit, evidence, and synthesis steps.

    What this plan prioritizes

    The goal is writing stamina, evidence fluency, and timing. Not passive reading. Not highlighting every page. You want to finish the exam with enough structure in your head that a prompt doesn't scare you.

    If you're starting from scratch, the honest advice is to stop asking how to “study harder” and start asking what kind of study changes performance. That means practice under time, review with a rubric, and a plan that gets more specific every week.

    Start With a Diagnostic Practice Exam Before Any Review

    Take a full timed diagnostic before you review a single unit. Yes, it might feel ugly. That's the point. A bad first score is useful because it tells you what to fix, and guessing is a worse problem than a low baseline.

    What the diagnostic tells you

    A real diagnostic does three jobs at once. It shows which units you can reason through, which historical thinking skills are weak, and what your current baseline looks like before you spend hours studying the wrong material. For APUSH, that means you're checking more than memorization. You're checking sourcing, argumentation, and chronology.

    Use the official timing and scoring conditions as closely as possible. Print the test, set hard timers, and grade the MCQ and short-answer sections against the official scoring guidance, not your gut. If you “felt fine” but missed the evidence point, the feeling doesn't matter.

    How to turn results into a ranked list

    After you score it, cluster every miss by unit and by theme. If one unit keeps showing up as a blind spot, it becomes a first-priority review target. If a unit is consistently below your personal comfort zone, it should go to the top of the list before you touch easier material.

    Don't build a study plan around what feels familiar. Build it around what keeps costing points.

    I'd also watch for recurring MCQ traps. The biggest ones are usually confusing causation with correlation and losing track of period boundaries. If you miss a question because you misread what time period it belongs to, that's not a content gap alone. That's a reading and classification problem.

    For a student-facing breakdown of AP exam question types, the guide on types of AP exam questions is worth using alongside your own error log. Once you know your weak spots, the rest of the work gets a lot less random.

    Build a Spaced, Skill-Based Daily Study Routine

    A good APUSH routine is repetitive on purpose. The goal is not variety for its own sake. It's keeping content alive while you train the exact skills the exam rewards.

    A weekly study schedule chart designed for academic success with daily blocks of practice and review.

    Use short blocks, not marathon sessions

    Work in 45 to 60 minute blocks on four days a week, then use one longer 90 minute practice session. Leave two days lighter or fully off so the material has time to settle. Within each block, pair content with a skill task so you don't drift into passive review.

    The cleanest structure is simple. Spend about 20 minutes on unit content, then 25 minutes on something that forces retrieval, like DBQ sourcing, LEQ outlining, or timed MCQs. The last part of every session should end with active recall, a short explanation, or a written paragraph. That's the part that makes memory stick.

    The timing matters too. Independent prep advice recommends 25 to 75 minute blocks, stimulus-based MCQs 2 to 3 times per week, and matching exam pacing at about 1 minute per MCQ in this AP U.S. History schedule guide. That aligns with the bigger rule here, which is that rereading is weak and retrieval is strong.

    Make spacing automatic

    Rotate weak units so they come back before you forget them. A simple three-cycle pattern works well. Review a unit, come back to it later in a shorter burst, then revisit it again before it fades. That's the whole point of spacing, you keep reopening the material instead of cramming it once and hoping it stays.

    If you want another useful outside reference on broader study habits, Kohru's study for exams effectively piece fits this kind of routine well, especially if you need help keeping sessions consistent rather than heroic.

    Use clear timing rules

    Here are the rules I'd give a student:

    • MCQs: cap yourself at about 2 minutes per question during practice, then review every miss immediately.
    • Document analysis: stop at 15 minutes for a DBQ document set before you start outlining.
    • Every session: finish with one paragraph you can score against the rubric.

    That rhythm beats a weekend cram almost every time. Frequency and feedback win.

    Practice the Updated SAQ and LEQ Formats Before Test Day

    The exam format is not static, and that matters. College Board says the short-answer and long-essay questions are being updated for the May 2027 exam, and its AP U.S. History materials now note that all SAQs include source material and that the LEQ uses a broader prompt that doesn't require you to cover an entire time period in its clarification document.

    Drill the SAQ as a short, exact response

    Stop thinking of the SAQ as a mini essay. It isn't. It's a tight answer built around source material, direct evidence, and exact language. If you ramble, you waste time and dilute the point.

    One of the most important habits is to practice each part separately. The second question now needs source analysis, so don't just memorize facts. Read the source, identify what it shows, and connect that interpretation to your answer. Keep the response tight enough that you can finish under pressure without talking yourself into circles.

    I'd use one SAQ set every four to five days. Time it strictly, then compare your response to official scoring samples if you have them. The point is to train a habit of answering what's asked, not dumping everything you remember.

    The best SAQ answers don't sound broad. They sound precise.

    Treat the LEQ like an argument, not a recap

    For the LEQ, choose the prompt carefully, then write a thesis that answers it. You still need contextualization and evidence, but the bigger change is mental. You're not proving you know a time period in full. You're building a case with targeted examples.

    That's why memorized essay templates fall apart. A broad prompt gives you room to be selective, and selective students usually score better than students who try to drag in every fact they know. If you want a useful companion piece on this, the discussion of why context matters in AP history essays is a good match for this skill set.

    Self-score every timed essay

    Use the official rubric and score yourself. If your thesis is vague, mark it down. If your evidence is thin, mark it down. If you can't explain why your examples support the claim, that's also a miss.

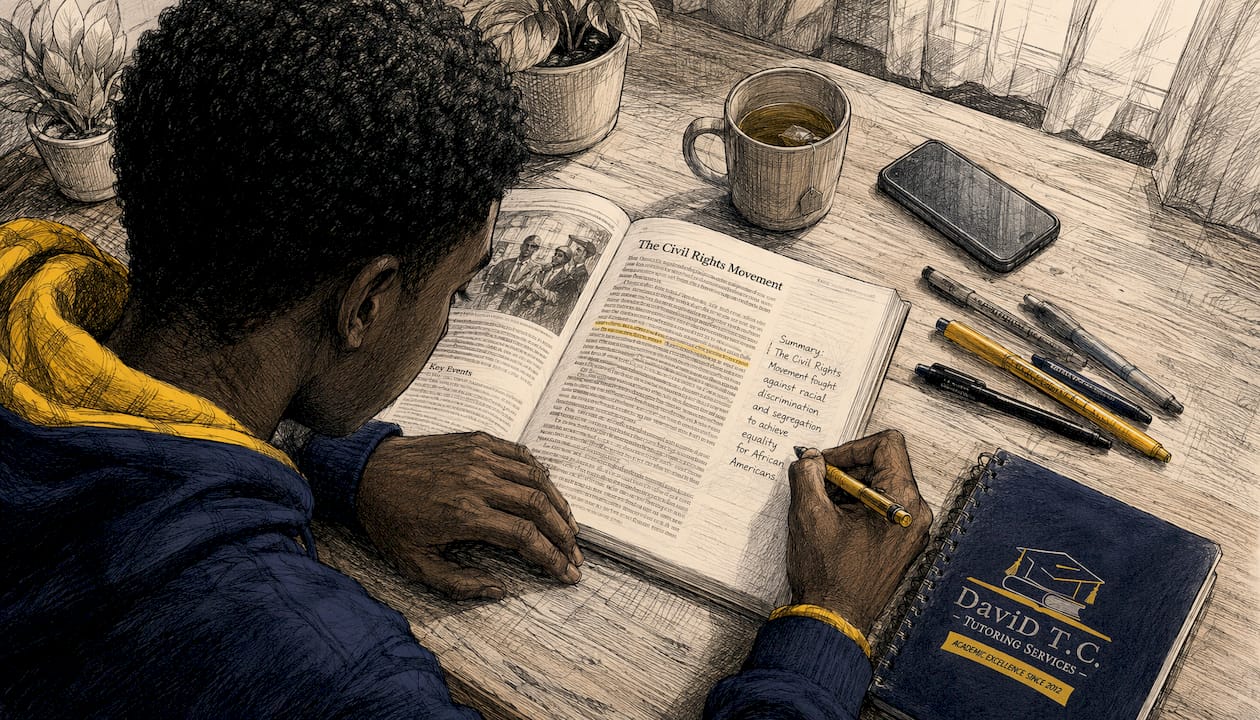
    One APUSH tutor option that fits this kind of work is David T.C. Tutoring Services, which offers one-on-one AP History support, including AP U.S. History study plans, test prep, DBQ coaching, and evidence-paragraph instruction. That kind of help makes sense if a student needs structure and feedback, not just more content.

    Prioritize Units 3 to 8 and Build a Compact Evidence Bank

    If you're short on time, don't pretend every unit deserves the same attention. Units 3 to 8 are the high-yield stretch, and they're where most students should spend the bulk of their serious review. Units 1, 2, and 9 still matter, but they do not deserve the same depth when time is tight.

    Build for recall, not for completeness

    Make one notebook page per high-yield unit. On each page, list five to seven named events, key dates, major groups, and one or two examples you can reuse in an SAQ or LEQ. That's enough to create a usable evidence bank without turning your notes into a second textbook.

    The point of this compact bank is speed. When a prompt hits, you want evidence to appear quickly, not after a five-minute memory hunt. A smaller set of mastered examples usually beats a sprawling set of half-known facts.

    What to keep and what to skim

    Here's the way I'd consider it:

    • Keep the units and themes you can use across multiple prompts: the units and themes you can use across multiple prompts.
    • Skim lightly: early foundational material that shows up less often for you.
    • Skip for now: long rereads of chapters you already understand at a basic level.

    That doesn't mean the earlier units are irrelevant. It means you're making a tradeoff. If your score is being held back by weak writing and scattered evidence, then your study time should fix that first.

    A simple chronological review resource can help you organize this faster, and the AP U.S. history chronological review and master timelines material is a sensible companion if you need the big picture without rebuilding everything from scratch.

    Use the bank to answer faster

    Each page should feed directly into your writing. If you know one event for causation, one for comparison, and one for continuity and change, you've turned a pile of notes into test-ready material. That's the actual goal, not prettier notebooks.

    Your 8 to 12 Week Revision Schedule Week by Week

    A real APUSH run-up should tighten over time. The first few weeks are for diagnosis and cleanup. The middle weeks are for content and skill repair. The last stretch is for timed execution and ruthless review.

    A structured revision schedule infographic showing a 12-week study plan for exams broken into four phases.

    Weeks 1 to 3 focus on foundation

    Start with the diagnostic, then build your evidence bank and begin light writing drills. Keep this phase controlled, not chaotic. You should be spending time understanding where the score leaks are instead of trying to memorize everything at once.

    Weeks 4 to 6 shift into skill-intensive work

    This is when content review of Units 3 to 8 gets serious. Add timed SAQ and LEQ practice every week, then use the rubric to identify what keeps breaking. If your thesis is weak, fix thesis writing. If your documents aren't being used well, fix sourcing.

    Weeks 7 to 9 move into timed exams

    At this stage, full practice exams every 10 to 14 days make sense, followed by an error log and a rewrite of the worst responses. Don't just review what you got wrong. Rewrite it in a better form, because that's how the skill improves.

    Weeks 10 to 12 narrow to exam readiness

    Now the plan gets sharper. Use mock exams, targeted rewrites, and quick checks of recurring weak spots. Anything that still feels fuzzy gets attention, but only if it's costing points. Sleep, schoolwork, and one rest day always beat squeezing in extra APUSH time.

    A realistic weekly load during this stretch is usually moderate rather than extreme. If you're working steadily, the point is consistency and feedback, not turning your life into a study camp.

    Final-Week Strategy and Common Parent Questions

    The final week should be boring on purpose. Do one timed multiple-choice set, one DBQ, one LEQ, and a few light SAQ drills. Stop adding new content. At that point, new material is just noise.

    The night before, pack your ID, pencils, approved materials, and anything your school requires. Go to bed on time, even if you feel underprepared. On the morning of the exam, keep the routine simple, eat, show up early, and don't try to learn one last unit in the car.

    Parents usually ask the same questions. How early is too early? The answer is if you start so early that you forget what you studied, you're doing it wrong. Does AP World knowledge transfer? Some broad habits do, but APUSH still demands its own evidence bank and its own source analysis habits. How do you know progress is real? When your writing gets cleaner, your evidence gets more specific, and your timed work stops falling apart.

    If a student keeps rereading but the essays don't improve, tutoring can help. The right help is targeted, not generic, and it should tighten the evidence bank, source analysis, and rubric use that this exam rewards most.


    If you want one-on-one help turning this into a real APUSH score plan, visit David T.C. Tutoring Services. David T.C. Tutoring Services offers AP U.S. History support through custom study plans, DBQ coaching, and writing feedback, so you can stop guessing and start training for the exam the right way.

    Created with the Outrank tool

  • History Reading Comprehension Tips: 10 Evidence-Based Strategies

    History Reading Comprehension Tips: 10 Evidence-Based Strategies

    Teach students to read history as an argument, not a timeline. The most effective approach combines previewing text structure, applying scaffolded reading methods such as the TeachingHistory.org Four Reads or the OER Project Three-Step Reading, and practicing active sourcing before deep reading begins. These methods, supported by the Library of Congress primary source collections and the work of Davidtctutoringservices since 2012, gives students and teachers a repeatable system for understanding complex historical texts.

    Three immediate actions:

    • Students: Before reading anything closely, skim the title, introduction, and conclusion to locate the author’s main argument.
    • Teachers: Model a sourcing read aloud — read the author, date, and purpose of a document before students touch the text.
    • Both: On a first pass, skip difficult vocabulary and focus only on identifying the big idea.

    Table of Contents

    Why does reading history require different skills?

    Reading history is not the same as reading a novel or a science textbook. A novel asks you to follow a story. A science text asks you to understand a process. A historical text asks you to evaluate an argument and weigh evidence. That distinction changes everything about how you should read.

    Disciplinary literacy in history means reading like a historian: identifying a thesis, questioning the source, placing the document in context, and comparing it with other accounts. UCL Discovery’s 2023 systematic review found that explicit instruction in historical thinking and teacher-led scaffolding produces measurable improvements in student historical literacy outcomes. Students who learn these habits write stronger essays and use sources more effectively.

    Reading history requires identifying arguments and evidence, not memorizing facts. The reader’s job is to ask: What is this author claiming? What evidence supports it? Why did this person write this, and what might they have left out?

    Consider the difference between reading a novel and reading a primary source. With a novel, you read from page one. With a primary source, you ask who wrote it, when, for what audience, and with what purpose before you read a single sentence of the body. That sourcing step is the foundation of historical thinking.

    Pinnacle Learning Research School recommends modeling strategies such as activating prior knowledge, prediction, and questioning to move students from passive to active readers. The Education Endowment Foundation similarly identifies explicit strategy instruction — prediction, questioning, summarizing — as an evidence-based approach to comprehension across subjects, with particular value in disciplinary contexts like history.

    Key disciplinary habits students need:

    • Distinguish between a topic and a thesis (a topic is a subject; a thesis is a claim about that subject)
    • Identify the author’s purpose and potential bias
    • Place a document in its historical context before interpreting it
    • Corroborate claims across multiple sources

    What are the core reading strategies for history students?

    The most reliable path through a difficult historical text follows a short sequence: preview the architecture, get the gist, source the document, read for argument, read for evidence, interrogate bias, then synthesize.

    Step-by-step reading sequence

    1. Preview — Read the title, table of contents, headings, introduction, and conclusion. Carleton College calls this “front-loading the book.” It gives you the argument’s skeleton before you encounter the details.
    2. First read for gist — Skim quickly. Read the first and last sentences of each paragraph. Do not stop for unfamiliar words.
    3. Source the document — For primary sources, identify author, date, audience, and purpose before reading the body.
    4. Read for argument — Locate the thesis. Write it in the margin in your own words.
    5. Read for evidence — Identify the two or three strongest pieces of evidence the author uses.
    6. Interrogate bias — Ask what the author might have omitted or distorted, and why.
    7. Synthesize — Write a one-sentence summary of the argument and your evaluation of it.

    Four Reads vs. Three-Step Reading vs. DBQ sourcing scaffold

    Method Focus Best text types Typical class time Key teacher move
    Four Reads (TeachingHistory.org) Source → gist → argument/evidence → synthesis Primary documents 30–45 min Model each read aloud before students attempt it
    Three-Step Reading (OER Project) Skim → read for evidence → evaluate/interpret Textbooks, secondary sources 20–30 min Pause after step 2 for a class check-in
    DBQ sourcing scaffold Sourcing, corroboration, evidence selection Document sets, AP prompts 40–50 min Provide a structured prompt and scoring guide

    Four Reads works best with primary documents. TeachingHistory.org describes the process as: a source/top-and-bottom read to establish context, a gist read for the big idea, an argument-and-evidence read for close analysis, and a synthesis read to connect the document to the broader historical question. Students who follow this sequence become, as TeachingHistory.org puts it, historical detectives — using sourcing to interrogate bias, omissions, and impact.

    Three-Step Reading is the go-to scaffold for textbook chapters and secondary sources. Students skim for the main idea first, then read for supporting evidence, then evaluate and interpret. It is faster than Four Reads and well-suited to homework assignments or in-class textbook work.

    DBQ-style scaffolds make evidence evaluation explicit. Structured prompts ask students to source each document, identify its argument, and select evidence for a written response. This format is widely used in AP and secondary classrooms and pairs naturally with a scoring rubric.

    Annotation practice

    Towson University recommends writing in margins and creating short gist summaries rather than passive highlighting. A shared annotation code makes this more consistent across a class.

    Suggested annotation shorthand:

    • T = thesis or main argument
    • E = key evidence
    • Q = question or point of confusion
    • B = possible bias or omission
    • C = connection to another source or event

    Pro Tip: On a first read, skip any word you do not recognize and keep moving. Mark it with a small circle and return only if it appears repeatedly or sits in a key sentence.

    Pro Tip: After finishing a section, write one sentence in the margin that captures the author’s point in your own words. This forces active processing and makes review much faster.

    Student writing annotation margin notes

    Student one-sentence habit: After every reading session, write the author’s thesis and one piece of supporting evidence in your own words before closing the book.


    What classroom activities build history reading skills quickly?

    The routines below are ready to run this week. Each one targets a specific reading skill and produces a student artifact teachers can use for formative assessment.

    1. Preview and thesis spotting (10–15 min)

    Objective: Students locate the author’s main argument before reading the full text.

    Teacher moves:

    • Distribute a one-page excerpt or a chapter introduction.
    • Direct students to read only the title, first paragraph, and last paragraph.
    • Students write one sentence: “The author argues that ___.”
    • Share out and discuss two or three responses as a class.

    Exit product: One written thesis statement per student.

    2. Four Reads scaffold (30–45 min)

    Objective: Students apply each of the four reads to a primary document from the Library of Congress or a textbook document set.

    Teacher moves:

    • Read 1: Students read only the source line (author, date, audience). Class discusses: Who wrote this? Why?
    • Read 2: Students skim the full document for the big idea. Two-minute pair share.
    • Read 3: Students annotate for argument and evidence using the T/E/B/Q code.
    • Read 4: Students write a two-sentence synthesis connecting the document to the unit’s essential question.

    Time estimate: 30–45 minutes for a one-page primary source.

    Adaptation for AP classes: Add a fifth step — students write a sourcing sentence using the format “According to [author], [claim], which suggests [historical significance].”

    Objective: Students compare two or three documents on the same event and identify agreements and contradictions.

    Teacher moves:

    • Post two or three short documents at stations around the room.
    • Students rotate every five minutes, annotating each document with one agreement and one contradiction relative to the others.
    • Class debrief: Where do the sources agree? Where do they conflict? What explains the difference?

    Exit product: A two-column evidence matrix (agrees / contradicts).

    4. Sourcing hotseat (15–20 min)

    Objective: Students practice rapid sourcing of unfamiliar documents.

    Teacher moves:

    • Display a document with the source line visible.
    • Students have two minutes to write: author, date, audience, purpose, and one likely bias.
    • Cold-call three students to share. Class evaluates each response.

    Exit product: Completed sourcing card.

    5. Indiana University “talk back” stop-and-summarize (15 min)

    Objective: Students practice pausing after short sections to summarize and question, rather than reading continuously.

    Based on Indiana University’s research guidance, students pause after each paragraph or section, write the main idea in one sentence, and note one question. This replaces exhaustive note-taking with focused active engagement.

    Teacher script (20-minute mini-lesson version):

    Repeat the cycle two or three times through the document. Collect the stop-and-summarize sheets as a formative check.

    6. Think-aloud modeling (10–15 min, teacher-led)

    Modeling a think-aloud is one of the highest-leverage moves a teacher can make. The teacher reads a document aloud and verbalizes the sourcing and skepticism process in real time: “I notice the author is a government official writing in 1917. That makes me wonder what perspective might be missing here.” Students observe, then attempt the same process independently with a second document.

    Teacher reading history document aloud


    How do you support ELL and struggling readers in history class?

    The highest-impact scaffolds are low-prep and do not reduce the intellectual demand of the task. The goal is access, not simplification.

    Top scaffolds for diverse learners:

    • Pre-teach three to five key terms before the reading, using images and brief definitions
    • Provide a one-paragraph contextual primer (who, what, when, where) before students read the primary source
    • Use guided notes with sentence frames rather than blank note-taking sheets
    • Chunk the text into sections of two to three paragraphs with a comprehension prompt after each chunk
    • Provide a simplified summary frame: “This document is about ___. The author’s main point is ___. One piece of evidence is ___.”
    • Offer vocabulary cards with the term, a student-friendly definition, and an example sentence
    • Use images, maps, or captions alongside the text to build visual context
    • Provide bilingual glosses for key terms when available
    • Allow students to annotate in their home language before translating key ideas
    • Use teacher modeling scripts so students hear the thinking process before attempting it independently

    Sentence starters for analyzing argument and bias:

    • “The author argues that ___ because ___.”
    • “This document was written by ___, which suggests ___.”
    • “One piece of evidence the author uses is ___.”
    • “The author may have left out ___ because ___.”
    • “This source agrees with / contradicts ___ because ___.”

    Differentiation checklist for lesson planning:

    • [ ] Key vocabulary pre-taught with visuals
    • [ ] Contextual primer provided
    • [ ] Text chunked with embedded prompts
    • [ ] Sentence starters available
    • [ ] Annotation code posted and explained
    • [ ] Modeling think-aloud planned

    Pro Tip: Scaffold the process, not the text. Give all students the same document, but provide sentence starters and a sourcing card to students who need support. This keeps the intellectual challenge intact while lowering the access barrier.


    How do you assess historical reading comprehension effectively?

    A short rubric aligned to disciplinary reading habits gives students clear targets and gives teachers usable data.

    Sample rubric for short written responses and DBQ-style tasks

    Criterion Exceeds Meets Approaching Needs support
    Thesis identification Identifies a specific, defensible thesis and explains its significance Identifies the author’s thesis accurately Identifies a topic but not a clear thesis Does not identify a thesis
    Evidence use Selects and explains two or more specific pieces of evidence Selects one relevant piece of evidence References the text vaguely No evidence cited
    Sourcing and context Addresses author, purpose, audience, and historical context Addresses two sourcing elements Addresses one sourcing element No sourcing attempted
    Interpretation Evaluates bias or omission and connects to broader context Makes a basic interpretive claim Summarizes without interpreting No interpretation present

    Sample feedback comments:

    • Exceeds: “Strong sourcing. You identified the author’s position and explained how it shapes the argument. Next step: connect this document to a second source.”
    • Meets: “Good thesis identification. Add one more piece of evidence and explain why it supports the claim.”
    • Approaching: “You identified the topic but not the argument. Ask: what is the author claiming about this topic?”
    • Needs support: “Start with the sourcing card. Who wrote this? When? For what audience?”

    Quick formative checks:

    • Exit ticket: “Write the author’s thesis in one sentence and name one piece of evidence.”
    • One-minute read-back: Students close the text and write everything they remember about the argument.
    • Evidence-swap peer check: Partners exchange annotated texts and verify each other’s thesis and evidence labels.

    Turn formative data into next-day instruction by grouping students who share the same gap (e.g., all students who could not identify a thesis) for a five-minute targeted reteach before the next reading task.

    DBQ-style rubrics also work well for student self-assessment. Students score their own response before submitting, which builds metacognitive awareness and reduces the gap between student and teacher evaluations.


    A ready-to-run 3-lesson mini-unit on primary source reading

    This mini-unit moves students from sourcing a document to writing an evidence-based paragraph. It works in a regular or AP class and adapts easily to one-on-one tutoring sessions.

    Mini-unit overview:

    Lesson Objective Student product
    1: Preview and source Students source a primary document and identify its context Completed sourcing card
    2: Argument and evidence Students annotate for argument and evidence in small groups Annotated document + evidence map
    3: Write and revise Students write and peer-review an evidence-based paragraph Final paragraph with peer feedback

    Lesson 1: Preview and source (30–40 min)

    Materials: One primary document (Library of Congress or textbook document set), sourcing card handout.

    Steps:

    1. Teacher models a think-aloud sourcing read (5 min): reads the source line aloud and verbalizes questions about author, date, audience, and purpose.
    2. Students complete the sourcing card independently (10 min): author, date, audience, purpose, one likely bias.
    3. Pair share: students compare sourcing cards and discuss differences (5 min).
    4. Class debrief: teacher records key sourcing observations on the board (5 min).
    5. Students write one sentence: “This document was written by ___ in order to ___.” (5 min)

    Tutor adaptation: In a one-on-one session, the tutor completes the sourcing card alongside the student, thinking aloud, then the student attempts a second document independently.

    Lesson 2: Argument and evidence (40–50 min)

    Materials: Same document plus a second document on the same event, annotation guide handout.

    Steps:

    1. Teacher reviews annotation code (T/E/Q/B/C) and models annotating the first paragraph (5 min).
    2. Small groups annotate the full document using the code (15 min).
    3. Groups create an evidence map: thesis in the center, three pieces of evidence branching out (10 min).
    4. Groups share evidence maps; class discusses which evidence is strongest and why (10 min).
    5. Exit ticket: “What is the author’s argument? What is the strongest evidence?” (5 min)

    Lesson 3: Write and revise (50–60 min)

    Materials: Paragraph plan handout, peer review protocol, rubric.

    Steps:

    1. Teacher models a paragraph plan: thesis sentence → evidence sentence → explanation sentence → connection sentence (5 min).
    2. Students draft an evidence-based paragraph using the plan (15 min).
    3. Peer review: partners use the rubric to score each other’s paragraph on thesis, evidence, and sourcing (10 min).
    4. Students revise based on peer feedback (10 min).
    5. Teacher provides written feedback aligned to rubric criteria (collected for next session).

    Downloadable checklist — teacher prep:

    • [ ] Primary document selected and copied
    • [ ] Sourcing card handout prepared
    • [ ] Annotation guide distributed
    • [ ] Evidence map template ready
    • [ ] Paragraph plan handout available
    • [ ] Peer review protocol and rubric printed

    Student handout components:

    • Sourcing card (author / date / audience / purpose / bias)
    • Annotation guide with T/E/Q/B/C code
    • Paragraph plan template (thesis → evidence → explanation → connection)

    Pro Tip: In a one-on-one tutoring session, compress Lessons 1 and 2 into a single 45-minute session by having the student annotate while the tutor coaches in real time. Reserve the full Lesson 3 for the second session so the student has time to draft and receive feedback without rushing.

    Downloadable reading comprehension PDFs from Davidtctutoringservices include annotation guides and paragraph plan templates that align directly with this mini-unit.


    Where can teachers and students find the best history reading resources?

    The resources below are ready to use in class or for independent study. Each entry includes a one-line usage note.

    • TeachingHistory.org Four Reads handout — Use as the primary scaffold for any primary-source lesson; includes teacher guidance and student-facing steps. Contains ready-made student worksheets.
    • Library of Congress primary source portal — Use for sourcing and corroboration exercises; provides letters, maps, photographs, and government documents across all U.S. history periods. Contains diverse document types for classroom use.
    • OER Project Three-Step Reading materials — Use for textbook and secondary-source reading assignments; efficient scaffold for homework or in-class reading. Teacher lesson templates available through the OER Project platform.
    • DBQ Project resources — Use for AP and secondary classrooms to teach evidence selection and structured writing; scoring rubrics included. Widely used in AP U.S. History and AP World History courses.
    • Carleton College reading history guide — Use to teach students how to distinguish topic from thesis and how to preview a monograph or article. Clear, student-facing language.
    • Towson University reading strategies guide — Use for annotation instruction; includes margin-note and gist-summary guidance. Practical and concise.
    • Indiana University research guide: reading sources — Use to teach the “talk back” stop-and-summarize method; pairs well with any close-reading lesson.
    • AP History Study Guides from Davidtctutoringservices — Use for AP-focused exam prep; aligned to AP History reading and writing demands.
    • Digital archives (e.g., Smithsonian, National Archives) — Use for images, maps, and visual primary sources to pair with written documents in corroboration exercises.

    What strategies help students on timed history tests and essays?

    On a timed exam, the reading moves that matter most are fast and deliberate. Five strategies cover most situations.

    Five test-day strategies:

    1. Preview the prompt and rubric first — Read the question before the documents. Know what argument you need to make before you read a word of evidence.
    2. Read the introduction and conclusion for thesis — On a timed document read, go to the first and last sentences of each document. That is where the argument lives.
    3. Annotate three pieces of evidence — Mark no more than three pieces of evidence per document. More than three slows you down without improving your response.
    4. Plan your paragraph before writing — Spend two minutes writing: thesis sentence, two evidence points, one connection. Do not skip this step under time pressure.
    5. Reserve five minutes to review — Check that your thesis is specific, your evidence is cited, and your sourcing is present.

    Student exam checklist:

    • [ ] Read the prompt before the documents
    • [ ] Identified the thesis of each document
    • [ ] Annotated three pieces of evidence
    • [ ] Written a paragraph plan
    • [ ] Reviewed thesis and sourcing before submitting

    15-minute speed drill for thesis identification:

    • Minutes 1–2: Teacher displays a one-paragraph excerpt. Students read silently.
    • Minutes 3–5: Students write: “The author’s thesis is ___. The strongest evidence is ___.”
    • Minutes 6–8: Pair share and compare responses.
    • Minutes 9–12: Teacher displays a second excerpt. Students repeat independently.
    • Minutes 13–15: Class debrief. Teacher identifies the most common error and corrects it.

    Run this drill two or three times per week in the weeks before an AP exam. Speed and accuracy both improve with repeated practice on varied document types.


    Key Takeaways

    Scaffolded reading methods — particularly Four Reads for primary sources and Three-Step Reading for textbooks — combined with active annotation and explicit sourcing practice, produce the strongest gains in historical reading comprehension.

    Point Details
    Preview before deep reading Read titles, introductions, and conclusions first to locate the thesis before tackling the full text.
    Use Four Reads for primary sources Apply source, gist, argument/evidence, and synthesis reads in sequence for primary documents.
    Annotate with a shared code Use T/E/Q/B/C margin codes so students and teachers share a common language for close reading.
    Scaffold access, not difficulty Provide sentence starters and sourcing cards for ELL and struggling readers without reducing the intellectual demand.
    Davidtctutoringservices support One-on-one tutoring sessions and downloadable PDFs from Davidtctutoringservices align directly with these strategies for AP and regular history courses.

    What actually works in history reading instruction

    Most students who struggle with historical texts are not struggling with reading. They are struggling with purpose. They open a primary source and try to absorb it the way they would absorb a story, moving from the first word to the last and hoping meaning accumulates. It rarely does.

    The fix is not more reading. It is a different entry point. Sourcing a document before reading it changes the cognitive task entirely. A student who knows the author, the date, and the intended audience reads the same text with a completely different set of questions. That shift from passive absorption to active interrogation is what disciplinary literacy instruction is actually trying to produce.

    A common error in tutoring sessions is poor note-taking during reading. Students highlight large blocks of text and then cannot reconstruct the argument later. The correction is straightforward: close the highlighter, open the margin, and write one sentence per section in your own words. That single habit, practiced consistently, does more for comprehension and essay quality than any amount of rereading.

    The research supports this. Indiana University’s guidance on “talk back” reading and Towson University’s annotation recommendations both point to the same conclusion: active, writing-based engagement with text outperforms passive reading every time. Scaffolded reading beats heroic rereading.


    Personalized history reading support from Davidtctutoringservices

    Students who work through these strategies in a structured, one-on-one setting move faster and retain more. Davidtctutoringservices offers regular tutoring sessions in AP History and Social Studies that apply the Four Reads scaffold, DBQ coaching, and evidence-paragraph instruction directly to each student’s current assignments and exam goals.

    Davidtctutoringservices

    For students preparing for AP U.S. History, AP World History, or a demanding high-school history course, specialty services include targeted DBQ coaching and timed essay practice. Downloadable annotation guides and paragraph plan templates are available through the Davidtctutoringservices shop. New clients can expect an initial session focused on diagnosing the specific reading habit that is holding their scores back, followed by a structured plan of targeted practice. To get started, visit the services overview page.


    FAQ

    What are the 4 historical reading skills?

    The four core historical reading skills are sourcing (identifying who wrote a document and why), contextualization (placing a document in its historical setting), corroboration (comparing claims across multiple sources), and close reading (analyzing argument and evidence within the text). These skills form the basis of disciplinary literacy in history.

    What are 7 strategies to improve reading comprehension?

    Seven evidence-based strategies are: previewing text structure, activating prior knowledge, predicting, questioning the text, annotating with a shared code, summarizing after each section, and synthesizing across sources. The Education Endowment Foundation identifies explicit instruction in these strategies as effective across subjects, with particular value in history.

    What are the 5 R’s of reading for history students?

    Definitions of the 5 R’s vary by source. A common version used in history instruction includes: Read (skim for gist), Record (annotate key points), Recite (summarize in your own words), Reflect (question and evaluate the argument), and Review (revisit notes soon after reading). Carleton College’s guidance on reviewing notes shortly after reading aligns with the Review step.

    What are the 4 reads in the TeachingHistory.org method?

    The Four Reads are: a source/top-and-bottom read to establish author, date, and audience; a gist read for the big idea; an argument-and-evidence read for close analysis; and a synthesis read to connect the document to the broader historical question. TeachingHistory.org designed this sequence specifically for primary documents.

    How does Davidtctutoringservices help with history reading comprehension?

    Davidtctutoringservices offers one-on-one tutoring sessions in AP History and Social Studies that apply Four Reads scaffolding, DBQ coaching, and evidence-paragraph instruction to each student’s current coursework. Downloadable annotation guides and paragraph plan templates are also available through the Davidtctutoringservices shop.

  • History Essay Writing Tips for High School and College

    History Essay Writing Tips for High School and College

    History essay writing tips are techniques that help students move beyond description into analytical argument, supported by evidence and structured reasoning. The difference between a passing essay and a high-scoring one is not how much you know. It is how well you argue. Analytical essays earn higher marks than descriptive ones, and that gap widens at the college level. Davidtctutoringservices has worked with students since 2012 on exactly this challenge, helping them shift from summarizing events to building arguments that hold up under scrutiny.

    1. History essay writing tips start with a strong thesis

    A thesis is the single most important sentence in your history essay. It states a specific, arguable claim that your evidence will support. Without it, your essay has no direction.

    A weak thesis describes. A strong thesis argues.

    • Weak: “The Civil War had many causes.”
    • Strong: “Economic competition between the industrial North and the agrarian South, not moral opposition to slavery, drove the political fractures that made the Civil War inevitable.”

    The strong version takes a position someone could reasonably disagree with. That is the test. If your thesis is a fact, it is not a thesis. History is an interpretive discipline with no single right answer, which means your essay must stake out a defensible claim and prove it.

    To build your thesis, start with your assignment prompt. Turn the prompt into a question, then answer it directly. That answer is your thesis. Every paragraph you write should connect back to it.

    Hands writing history thesis draft on paper

    Pro Tip: Write your thesis last, after you have gathered your evidence. Most students write it first and then force their evidence to fit. Reversing the order produces a sharper, more accurate claim.

    2. Organize your essay around themes, not timelines

    Chronological narration is the most common structural mistake in history essays. Listing events in order tells a story. It does not build an argument. Thematic organization keeps your essay analytical and focused.

    Each body paragraph should address one theme that supports your thesis. Use the Point, Evidence, Analysis, Counter-argument, and Evaluation method for each paragraph:

    1. Point: State the paragraph’s main claim.
    2. Evidence: Cite a specific source, statistic, or event.
    3. Analysis: Explain what the evidence proves.
    4. Counter-argument: Acknowledge an opposing view.
    5. Evaluation: Explain why your argument still holds.

    This structure keeps every paragraph working toward your thesis. It also forces you to engage with complexity, which is exactly what professors reward. Transitions between paragraphs matter too. Each paragraph should end by connecting its point to the next one, maintaining logical flow throughout.

    Pro Tip: Label your paragraphs by theme before you write them. If you cannot name the theme in three words or fewer, the paragraph lacks focus.

    3. Use primary and secondary sources with critical judgment

    Sources are not just evidence. They are arguments made by people with specific purposes, biases, and contexts. Critically assess every source for authorship, intended audience, and potential bias before you use it.

    Primary sources are firsthand accounts: letters, speeches, government documents, photographs, and census data. Secondary sources are scholarly interpretations of those primary materials. Both have a place in a strong history essay, but they serve different functions. Primary sources provide raw evidence. Secondary sources show you where your argument fits within existing scholarly debate.

    When reading a primary source, ask four questions:

    • Who created it, and why?
    • Who was the intended audience?
    • What does it reveal about the period’s assumptions and values?
    • What does it leave out?

    “Effective history essays engage with different interpretations and counter-arguments, supporting them with robust evidence. Challenging ‘canonical’ views is appropriate if backed by strong primary source analysis.” — American Historical Association

    Engaging with historiographical debates, meaning the ongoing scholarly conversation about how to interpret historical events, positions your essay within that conversation. You do not need to resolve the debate. You need to show you understand it and that your argument contributes to it.

    4. Paraphrase most evidence, quote selectively

    Most students quote too much. Quoting large blocks of text signals that you are letting the source do the thinking. Paraphrasing most evidence and reserving quotations for unique wording or special emphasis keeps the essay in your voice and shows that you understand the material.

    A direct quote works when the original wording is so precise or distinctive that paraphrasing would lose its meaning. For example, quoting a specific phrase from a presidential speech is appropriate when the exact language is the point. Paraphrasing a historian’s argument about economic trends is almost always better than quoting it word for word.

    When you do quote, integrate the quote into your sentence. Do not drop a quote and move on. Follow every quote with a sentence explaining what it proves in relation to your thesis. That explanation is the analysis, and it is what separates a strong essay from a weak one.

    5. Common mistakes that lower history essay scores

    Common pitfalls include over-summary, weak thesis statements, poor paragraph cohesion, and failure to connect evidence back to the argument. Each of these mistakes is fixable once you know what to look for.

    • Over-summary: Retelling what happened instead of explaining why it matters. Fix this by asking “so what?” after every paragraph.
    • Weak thesis: A thesis that describes rather than argues. Fix this by making sure someone could reasonably disagree with your claim.
    • First-person and second-person language: Phrases like “I think” or “you can see” weaken academic credibility. Formal academic writing requires an objective, evidence-driven tone. Remove “I” and “you” entirely.
    • Disconnected paragraphs: Body paragraphs that do not connect back to the thesis read as a list of facts, not an argument. End each paragraph with a sentence that ties its point back to your central claim.
    • No proofreading: Spelling and grammar errors signal carelessness. Read your essay aloud before submitting. Your ear catches errors your eyes miss.

    Fixing these five issues alone will raise the quality of most history essays significantly.

    6. Practical strategies to sharpen your writing process

    The writing process matters as much as the final product. Students who skip pre-writing consistently produce weaker essays than those who plan. Outlining before writing sharpens essay flow and prevents structural faults that are hard to fix after the fact.

    1. Write a working outline first. List your thesis, each paragraph’s theme, and the evidence you plan to use. This takes 20 minutes and saves hours of revision.
    2. Draft without stopping. Write the full draft without editing as you go. Editing mid-draft kills momentum and produces choppy prose.
    3. Address counter-arguments directly. Acknowledging an opposing view and then refuting it with evidence makes your argument stronger, not weaker.
    4. Maintain an objective tone. State your argument confidently, but let the evidence carry the persuasion. Avoid emotional language.
    5. Revise in two passes. First pass: check argument and structure. Second pass: check grammar, tone, and citations.

    Pro Tip: After your first draft, read only your topic sentences in order. They should form a coherent summary of your argument. If they do not, your structure needs work.

    Key Takeaways

    Strong history essays require a specific, arguable thesis supported by thematic paragraphs, critically evaluated sources, and consistent analytical reasoning throughout.

    Point Details
    Thesis drives everything Write a specific, arguable claim that every paragraph supports and connects back to.
    Thematic over chronological Organize body paragraphs by theme using the Point, Evidence, Analysis, Counter-argument, Evaluation method.
    Sources need critical reading Assess every source for authorship, bias, context, and audience before using it as evidence.
    Paraphrase, quote selectively Reserve direct quotes for unique wording; paraphrase most evidence to keep your own voice.
    Outline before you draft A written outline prevents structural faults and keeps your argument focused from start to finish.

    What I have learned from years of working with history students

    Students consistently struggle with the same problem: they know the history, but they do not know how to argue about it. They write detailed summaries and expect that to be enough. It is not.

    The shift from summary to analysis is the hardest skill to teach, and it does not happen automatically. It requires students to understand that history is not a collection of settled facts. It is a discipline built on interpretation, debate, and evidence. Once a student genuinely accepts that, their writing changes. They stop trying to report what happened and start trying to prove something.

    The other thing I have seen consistently is that students who outline write better essays, every time. Not because outlining is a magic fix, but because it forces you to think before you write. Most structural problems in history essays are really thinking problems. The outline exposes them before they become embedded in a draft.

    Feedback also matters more than most students realize. Reading a marked-up essay and understanding why a paragraph failed teaches more than any general writing guide. That is where real improvement happens, one specific critique at a time.

    — David

    Personalized support for history essay writing

    Students who want to move from average to strong history essays often benefit from direct, structured feedback on their specific writing patterns.

    https://davidtctutoringservices.com

    Davidtctutoringservices offers personalized tutoring sessions focused on history essay structure, thesis development, and source analysis. Students preparing for AP History exams can also access AP History study guides designed to build both content knowledge and essay writing skills. Sessions are tailored to each student’s current level and specific assignment requirements. Davidtctutoringservices has supported students in these subjects since 2012, with a track record of measurable grade improvement and stronger analytical writing.

    FAQ

    What makes a history thesis statement strong?

    A strong thesis makes a specific, arguable claim that your evidence supports. If your thesis states a fact rather than a position, rewrite it as an interpretive claim someone could reasonably challenge.

    Should history essays be organized chronologically?

    Thematic organization produces stronger analytical essays than chronological narration. Arrange body paragraphs around ideas that support your thesis, not around the sequence of events.

    How do I use sources without over-quoting?

    Paraphrase most evidence and reserve direct quotes for wording that is uniquely significant. Follow every quote with a sentence explaining what it proves in relation to your thesis.

    What is the most common mistake in history essays?

    Over-summary is the most frequent error. Students retell events instead of analyzing their significance. Fix this by asking “so what?” after every paragraph to confirm you are making an argument, not telling a story.

    Is it acceptable to challenge established historical interpretations?

    Challenging established views is academically appropriate when your argument is backed by strong primary source analysis. The American Historical Association confirms that dissenting arguments are valid when supported by robust evidence.